Review Interface
Verify and correct recognized text in the side-by-side review interface.
Access
- Go to Job Control view
- Click the
Reviewbutton on a job - Interface opens in a new window
Layout
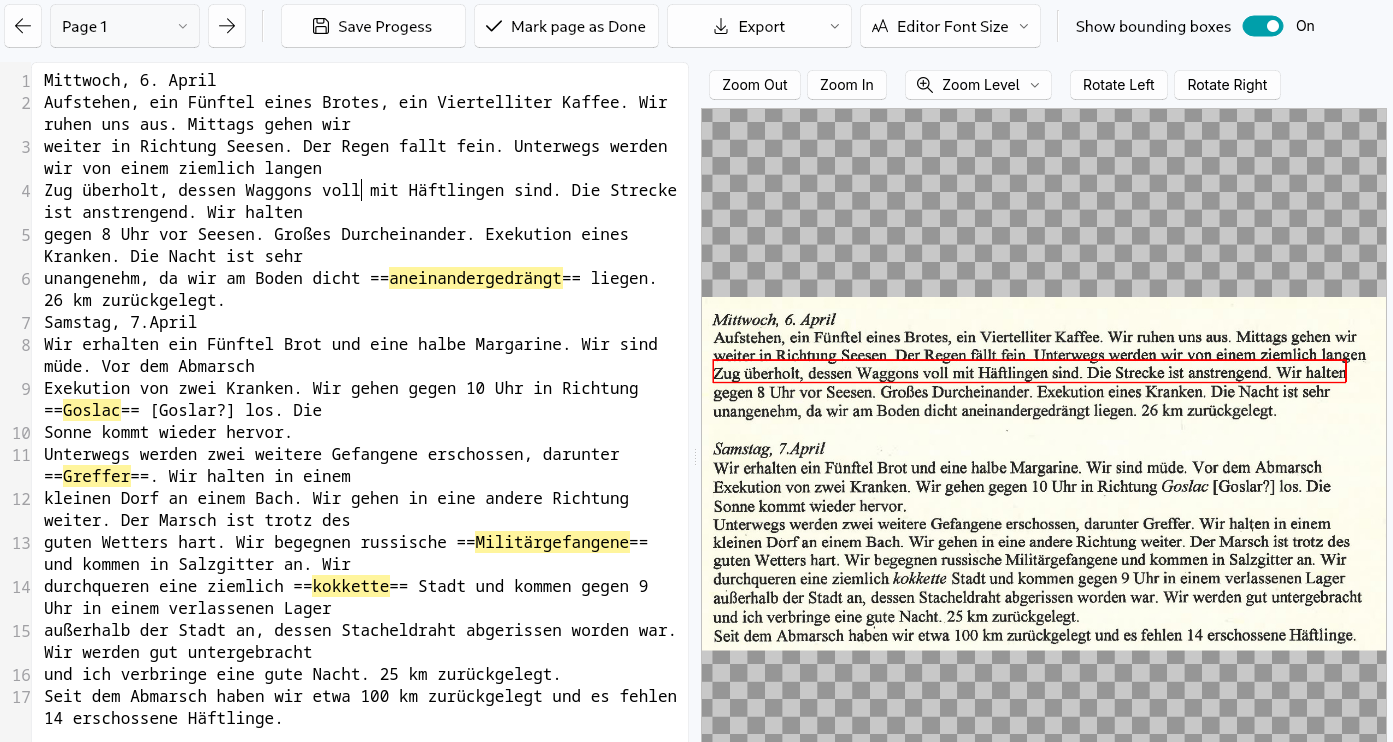
- Left - Recognized text (editable)
- Right - Original image with the corresponding text line enclosed in a red box (bounding box)
- Navigation - Arrow buttons (top-left) to move between pages
Editing (Left)
- Click the text block to edit
- Modify text
- Save your changes using the
Savebutton
The current line will be highlighted in the original image as a red box. You can turn off this behaviour by toggling the Show bounding boxes switch.
The editing view preserves the original document's line breaks exactly as they appear in the source image. This means if a word was split across lines in the original document, it will remain split in the recognized text.
Example: If the original document has a line break in the middle of a word, like this:
The word "over" appears split across two lines (ov- and er) because that's how it appeared in the original document. Textum preserves this formatting to match the original layout.
Note: Currently no automatic merging of lines or words is performed. You can manually edit the text to combine split words or adjust line breaks if needed.
Image view (Right)
- This is where the corresponding original input file will be displayed
- Zooming and panning is supported using the mouse and mouse wheel
- You can also use the
Zoombuttons - Double-click the image to reset the zoom level
Unknown Words
If you selected a language during job creation, unknown words will be highlighted if they are not found in the language's dictionary file. This behaviour can be disabled by selecting Unset as a language during job creation. It is not possible to automatically remove all highlights for a completed job. It is also not possible to change the language used for spellchecking after the job was created.
The yellow highlighting is implemented using a special syntax. Every word or phrase that is enclosed by two equal signs (==) will be highlighted in yellow.
The highlighting is done so you can find possible text recognition mistakes quickly.
To correct a phrase and remove the highlighting, simply remove the enclosing equal signs (==). For example:
Before (with highlighting):
The quick brown ==foxx== jumps over the lazy dog.After (typo fixed, highlighting removed):
== markers, the highlighting disappears.
Because the highlighting is implemented in text text editor itself, you can also create your own highlightings! Just enclose any word you are not sure of in equal signs: ==check this later==. This is particularly useful if you need to do later research about a historical term, for example.
Workflow
- Quickly scan some pages to make sure no grave errors happened
Review each page:
- First check all highlights and correct them. Also remove the
==markers. - Then go in depth and check each line
- Save your progress on the current page using
Savebutton - Mark the page as Done
- Continue with the next page
- After you're done reviewing all pages, export the whole transcription to various formats
The Mark as Done functionality is particularly useful for large inputs, as it allows you to track your progress within the document and continue at a later stage, exactly where you left off. When you mark a page as done, a little checkmark shows up next to it in the page selector dropdown.
Export
After reviewing, click Export or return to Job Control to export. Always save your progress.